

It’s time to start using Intune to do stuff. Let’s take a crack at deploying applications.
Can Walter Denton successfully roll out the new student grading software without hijinks ensuing?
It’s the “Our Miss Brooks” episode “Walter’s First Rollout”!
So, let’s suspend our disbelief for a while and venture back to 1954 where Madison High School has moved to managing their PCs using Intune. How did they get PCs? How did they get Intune? I mean Bill Gates hasn’t even been born yet. This is 1950s television, so sit back, relax and let’s learn about deploying applications with Intune.
Scenario
Walter Denton, long-term student at Madison High School acts as the school’s Intune admin. He has been tasked with deploying the new grading software that will be used in the coming school year. He has been given the following requirements:
- It is required for all teachers
- It should be made available to be installed manually by school administrators
- Students should not receive the software
- The software should be available to install beginning August 10th for all teachers and administrators
- The software should be installed automatically on August 19th for all teachers and
Bonus: The software is not compatible with Windows 11 yet
Bonus 2: The Biology department is not ready for the new software, so they should not receive it
Introduction
There are a number of steps that need to be taken, just like there would be if we were using Configuration Manager to handle this rollout.
This table shows the users that will be involved in this demonstration.
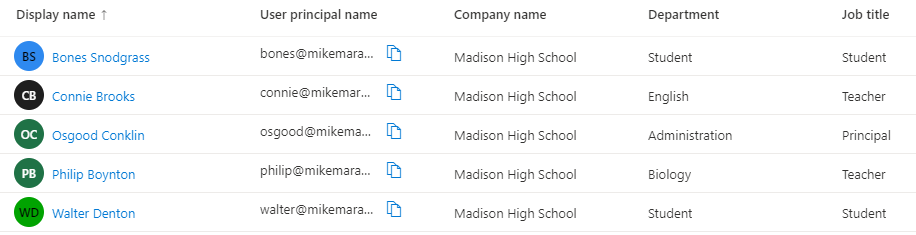
Osgood Conklin is the principal of the school and the only member of the Administration department.
There are two teachers, Connie Brooks and Philip Boynton.
Finally, we have two students: Bones Snodgrass and Walter Denton.
How would it be done using Configuration Manager?
In no particular order, we would create either a package or an application for the software, then create a set of collections to organize our different deployment scenarios, and then finally create a set of deployments to match those scenarios.
We would have a collection of the Administrators. This collection would have a deployment of the software being available for the users to install from Software Center starting on the 15th of August.
A second collection of the teachers would have a mandatory deployment of the software becoming available the 15th of August and a deadline of the 19th of August.
In general, we are going to do the exact same thing with Intune. Things might look different and different names will be used, but the concept will still be familiar.
We are going to go over the following steps:
- Packaing the Software
- Adding the Software to Intune
- Deploying the Software
There will also be a small tidbit about leveraging Filters to account for the Windows 11 incompatibility mentioned in the scenario above.
Win32App Packaging
Packaging the software is probably the largest difference between Intune and Configuration Manager. With Configuration Manager when we create a package or an application, we would point to a folder that contained all of the files needed to install the software. Configuration Manager would use this as the source when sending out the software to the distribution points.
With Intune you need to package the software into a single, compressed file. Why? There are a number of technical reasons, but for our concern I can think of two things. First, a single file transfers (particularly across the Internet) much faster and more efficiently than hundreds of smaller individual files. Second, the content is encrypted by Microsoft’s packaging tool.
Packaging Process
The process of packaging an application for Intune is really simple. Microsoft has a command line utility that does all of the work. All you need to do is provide the source folder containing the installation files, a folder for the utility to save the result to, and the name of the file that is used to install the software.
Microsoft Utility
Microsoft has a simple command line utility (IntuneWinAppUtil.exe) that handles the grunt work of packaging the software.
| In the Reference section at the end of this blog post you will find links to the official Microsoft documentation on not only this utility but also managing Win32Apps as well. |
Demo Packaging 7Zip
For this demonstration I’ll use 7Zip as a stand-in for the grading software.
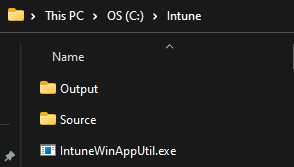
On the root of my C drive, I created a working folder named “Intune”. Inside of that folder I created a pair of subfolders, “Source” and “Output”. (I know, real imaginative.) In the “Source” folder I placed all of the files needed to install the software. In this case it is just a single MSI.

Next, I downloaded the Microsoft packaging utility to the C:\Intune folder.
As with any command-line utility there are parameters that you can pass to provide the required information. This is great for automating the process with a script, but for this demo I want to show the interactive process.
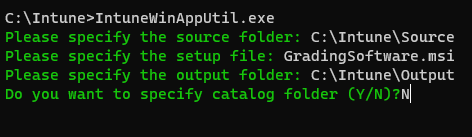
Open a command prompt and change to the C:\Intune folder. Simply execute IntuneWinAppUtil.exe with no additional parameters. The utility will prompt you for four pieces of information.
- Please specify the source folder
- Please specify the setup file
- Please specify the output folder
- Do you want to specify catalog folder (Y/N)?
The command-line arguments to accomplish the same result would be:
| IntuneWinAppUtil.exe -c C:\Intune\Source -s GradingSoftware.msi -o C:\Intune\Output |
What is Happening?
The first three prompts are self-explanatory; you specify the source folder, the name of the setup file, and the folder you want the resultant file saved to. But what is this “catalog folder” it is asking about? This is used for deployments to Windows S mode devices. If you are not using Windows S mode devices, then you do not need to specify a catalog folder.
I want to call out using an MSI for the setup file. Using an MSI has some advantages in this process over executables or scripts. The utility will parse the MSI and gather the relevant information on things like the install and uninstall lines, and the MSI detection method. This makes setting up the application within Intune easier as you will soon see.
After the utility completes you will have in the Output folder a single file named after the file you specified as the “setup file” in the prompts with an extension of .intunewin.
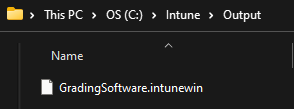
This file contains everything we need to deploy the software using Intune. We will now import this file and create an application that we can deploy.
Importing Applications
After you’ve packaged the software in the .intunewin format you can import it into Intune, and then things begin to become similar to Configuration Manager.
From within the Intune console, you will select Apps > Windows. Then click the “+Add” button at the top of the screen.
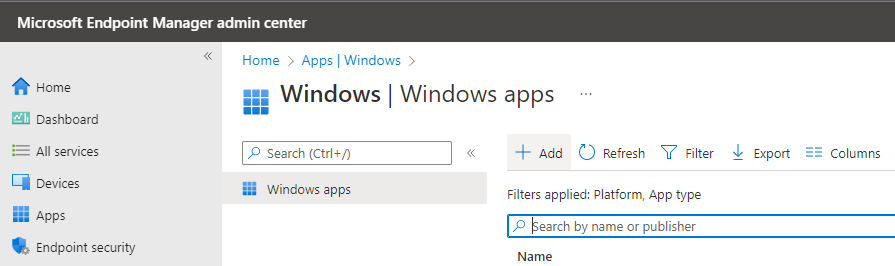
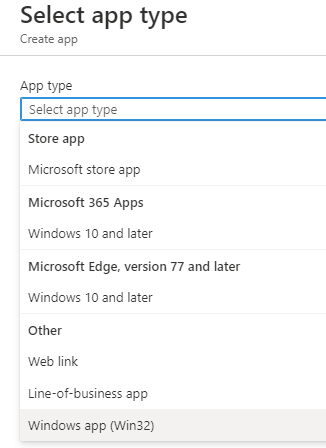
You will be prompted to select what type of app you wish to add. The option we are interested in is the “Windows app (Win32)”. It will be the last option in the list of application types.
The first step will be to select the application package file. This is the intunewin file generated by the packaging utility. You can think of this as designating the package source for a Configuration Manager package. You will be prompted to select the intunewin file.
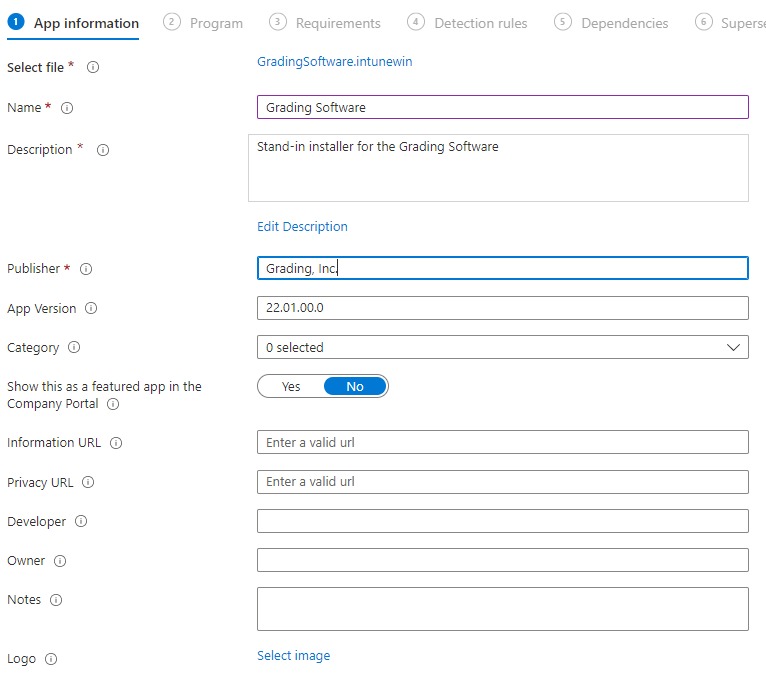
App Information
From here, while the screens may look different the concepts should be very familiar to ConfigMgr admins. You fill first have the option to change things like the application name, description, version, etc. A note about the “Show this as a featured app…” toggle, there is a special section of the Company Portal (Intune’s equivalent to Software Center) where you can post applications that you want to bring to the user’s attention quickly and easily. I will illustrate this later.
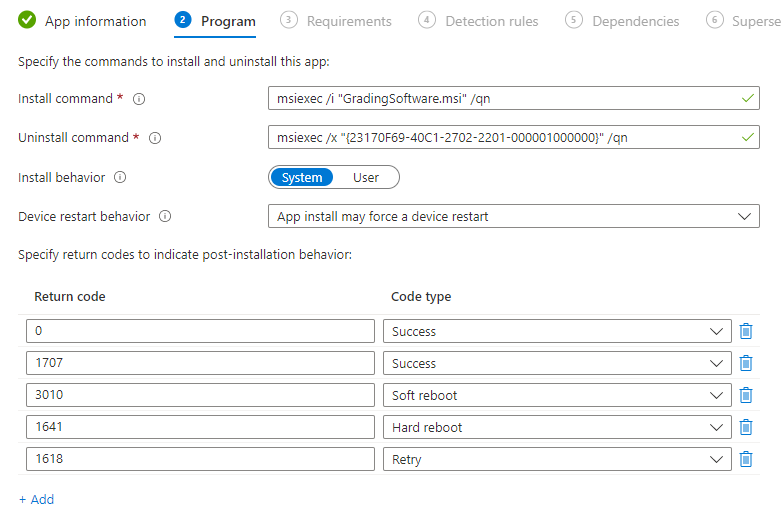
Program
Next, similar to setting up a program for a package in Configuration Manager, you will specify the install and uninstall commands, return codes, etc. If you packaged an MSI like we have in this example, you will find that Intune has already populated the install and uninstall commands. This comes from the packaging utility parsing the MSI.
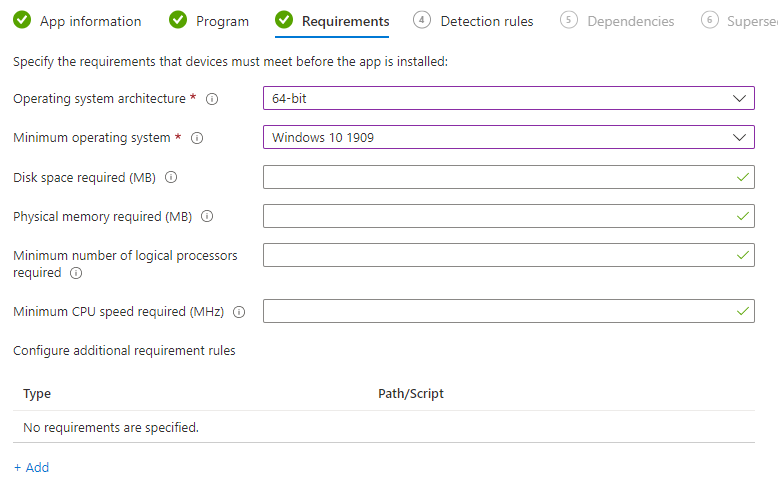
Requirements
The next step in the wizard will allow you to set some basic requirements. You can also use a custom script to check for more complex or custom requirements.
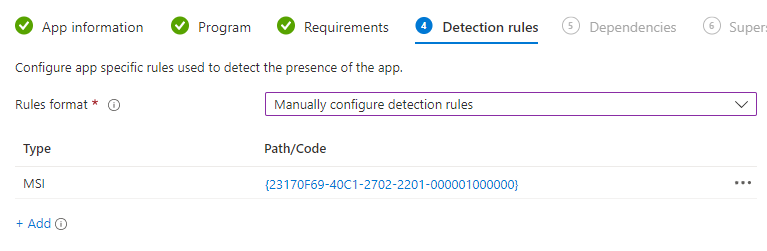
Detection Rules
Similar to an application model in Configuration Manager, you will next be asked to set the detection rules. You can use a custom script, or you can manually configure either an MSI, file or Registry check. Since we used an MSI in our package, Intune will have the MSI detection details already.
You can skip the remaining pages of the wizard for this demo. Otherwise, you would be able to set dependencies and supersedence similar to what you can do with Configuration Manager.
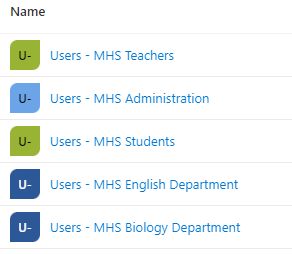
Assigning
I already have created some user groups for Madison High School. These are Dynamic User Groups that key off of things like the user’s department or job title. For example, the “Users – MHS Teachers” pulls in any user that has a job title of “Teacher”. The “Users – MHS English Department” pulls in any user that has a department value of “English”.
Teachers
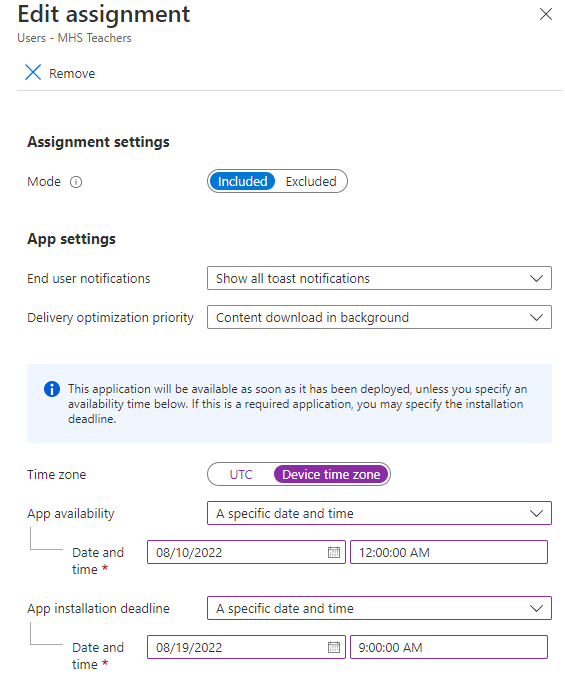
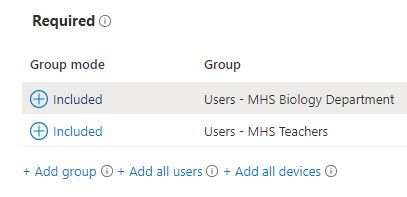
Let’s start with the mandatory assignment for the teachers. On the assignments page, under the Required section click on “+Add Group” and then select the “Users – MHS Teachers” group. A Required assignment, as the name suggests, is the same as a mandatory deployment in Configuration Manager; the software will be automatically installed on the client at a given date and time.

The scenario stated that the software should be available beginning August 10th and a deadline of August 19th. To do this, click on the “As soon as possible” hyper-link under either the Availability or Installation Deadline columns. Here you can set the date/time the software will become available and when it will be installed automatically.
Now, here’s a gotcha that you need to keep in mind. Unlike a Configuration Manager deployment, a required assignment will NOT display in the Company Portal. So, it will not be available for the user to install prior to the deadline. To make it available to the user to install prior to the deadline, you will need to create a second Available assignment for another group that includes the teachers. Intune will not allow you to use the same group for both Required and Available assignments. So, I will add an Available assignment and use the Users – MHS English Department and Biology Department groups.
In this configuration, the teachers will be able to manually install the application any time after it becomes available and prior to the deadline.
What does it look like from the teacher’s point of view?
Well, it will look something like this:
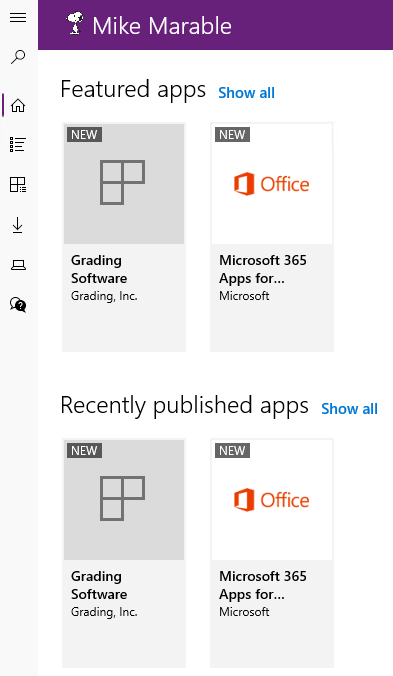
The “Grading Software” from our demo is shown in the Recently Published Apps section, this is by default since it has just recently been published.
Now, remember earlier when I mentioned that toggle to show the application as a featured app? If you set that to Yes then you will see your application “pinned” to that Featured Apps section at the top of the Company Portal. Apps that your user will often install would be a prime candidate for this.
If I click on the Grading Software app I will see this:
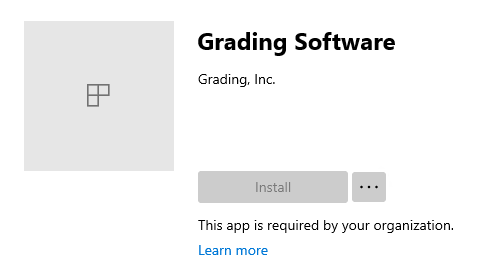
It shows that the app is required by the organization. This means that it is a required app and will be automatically installed at the deadline. So, what is the deadline? To be honest, I have not found it shown in the Company Portal. Of course, once I say that someone will find it. 😉
Administrators
The administrators (i.e., the principal) will not have a deadline to install the software but can install it any time after it becomes available. Just like we did with adding the English and Biology Department groups, we will add the Users – MHS Administrators group to an Available assignment. And just like the Required assignment we will set the date and time when the software will become available on August 10th.
The principal will see the application in the Company Portal just like the teachers do. What will appear differently is when the principal clicks on the application…
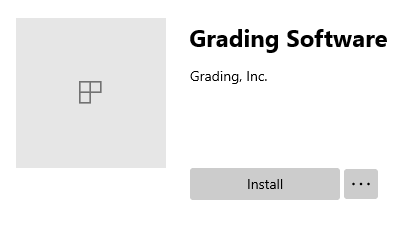
Notice anything? There is no text below the “Install” button stating that the application is required by the organization. This is because it is an available assignment and not a required one.
Additional Use Cases
Let’s say that for some reason the biology department is not ready to use the new grading software. How can you prevent any members of the biology department from receiving or installing the new software?
This is a two step process. The first step would be to not add the Users – MHS Biology Department group to the available assignments for the application. This would prevent the application from appearing in the Company Portal for any of the users in the Biology Department. Second (and most important), we would want to prevent the automatic installation of the software. So, how do we exclude them?
We already have a required assignment targeting all of the teachers. What we will do is add another required assignment for the Users – MHS Biology Department group. We’ll do this just like we did for the group of all teachers.
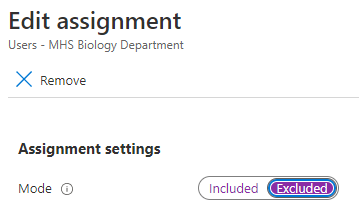
That’s the first step. Remember, just about everything is a clickable link within the Intune console. Click on the Include link in the Group Mode column for the Biology Department. You can change the assignment settings to Exclude. This now will exclude members of the Biology Department group from receiving the required deployment of the application.
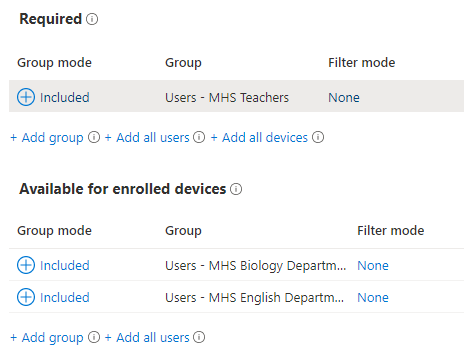
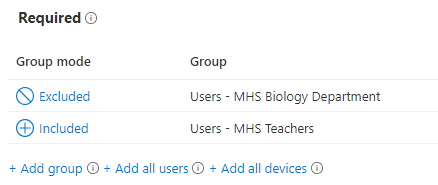
This is how the Required assignments will now appear for the Grading Software application.
What if the software was not compatible with Windows 11? How would you exclude those devices?
I’m glad you asked. Let’s talk very briefly about Filters…
Filters
What is a filter? A filter, as the name implies, allows you to filter the target population of users or devices for an assignment. Trying to prevent the application from installing on Windows 11 devices is a perfect scenario for using a filter.
First, let’s take a look at one.

Filters are pretty simple to set up. The syntax is very similar to the queries used in dynamic groups. In this example the filter looks for OS versions that begin with “10.0.22”.
Okay, so how do we use it?
Filters are used by assignments, so let’s pull up the assignments for our demo Grading Software.

Again, most everything is a link of some kind. Click the None links in either the Filter Mode or Filter columns, they will both bring you to the same dialog.
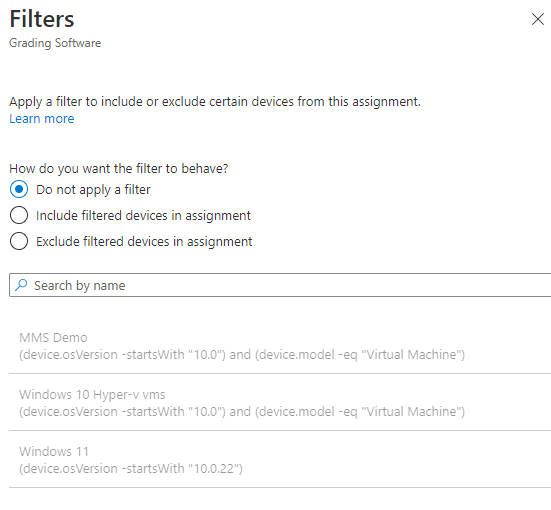
Here you will first select if you want the filter to be used to either Include devices or Exclude devices, and then which filter you want to leverage. In our test case we would select “Exclude filtered devices…” and then pick our Windows 11 filter. This will instruct Intune to filter out (exclude) any devices where the OS version starts with “10.0.22” (Windows 11) from the required assignment of the software.
Hopefully this was helpful in matching up how applications are added and assigned within Intune, with how they are done in Configuration Manager. Remember, while dialogs may look different and new names are used, the fundamentals are still the same.
Also, remember to click on stuff.
Reference Info
Win32 app management in Microsoft Intune | Microsoft Docs
Add and assign Win32 apps to Microsoft Intune | Microsoft Docs
Prepare a Win32 app to be uploaded to Microsoft Intune | Microsoft Docs
Enable Win32 apps on S mode devices – Microsoft Intune | Microsoft Docs